Brewboard is a small Next.js app for tracking craft beers — it ships with six features already written and waiting in the backlog. Use it to get a feel for the full Aigon workflow before adding Aigon to a real project.
You can drive Aigon from three different surfaces. This tutorial walks through all three:
- The dashboard — click-to-run from the browser UI
- Slash commands — inside a Claude Code session
- The CLI — from your terminal
Each section covers Drive mode, Fleet mode, and Autonomous mode.
Prerequisites: You’ve already installed Aigon, at least one agent CLI, and configured your terminal. If not, start with Getting Started.
What’s in the repo
Brewboard has six pre-written feature specs, each describing a small, self-contained change:
| ID | Feature | Description |
|---|---|---|
| 01 | Dark Mode | Theme toggle, OS preference detection, localStorage persistence |
| 02 | Brewery Import | CSV parser — reads a beer list and adds to a JSON collection |
| 03 | Rating System | Star rating component with half-star support |
| 04 | Featured Beer Hero | Hero section on the homepage showing a featured beer (depends on #03) |
| — | Beer Style Filters | Filter the beer list by style |
| — | Social Sharing | Share a beer with a generated URL |
Each spec has acceptance criteria, a technical approach, and out-of-scope constraints — so the agent has clear boundaries and knows exactly when it’s done.
Set up Brewboard
Install Brewboard
aigon install-seed brewboardThat one command clones the seed to ~/src/brewboard, strips the origin remote (so this stays a local sandbox), runs npm install, applies Aigon, and registers the repo with the dashboard.
Pick your agent
cd ~/src/brewboard
aigon install-agent cc          # swap for gg, cx, or cu if you prefer
Start the dashboard server
If the wizard didn’t start it, do so now:
aigon server start --persistent # install as a persistent system serviceOpen http://localhost:4100 . You’ll see the Brewboard repo in the sidebar and its six features spread across the pipeline.
--persistent installs Aigon as a launchd service (macOS) or systemd user service (Linux) — it survives terminal closes and machine restarts. You can skip it and use aigon server start for a foreground process instead.
1. From the dashboard
The dashboard is the most visual way to interact with Aigon. Open http://localhost:4100 and navigate to the Brewboard repo.
Drive mode
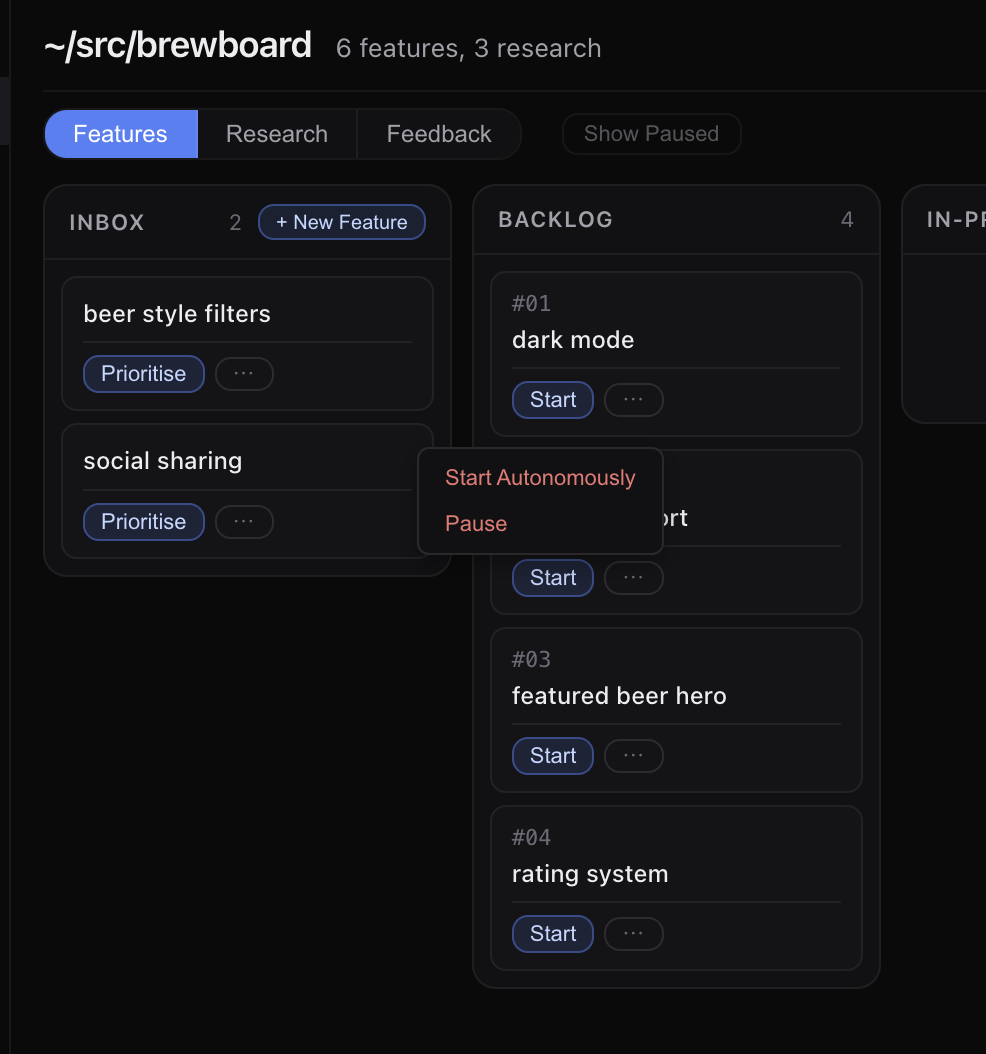
In the Pipeline view, find feature 01 — Format Date in the Backlog column. Click Start on the card — a picker appears where you select one agent to drive the implementation.
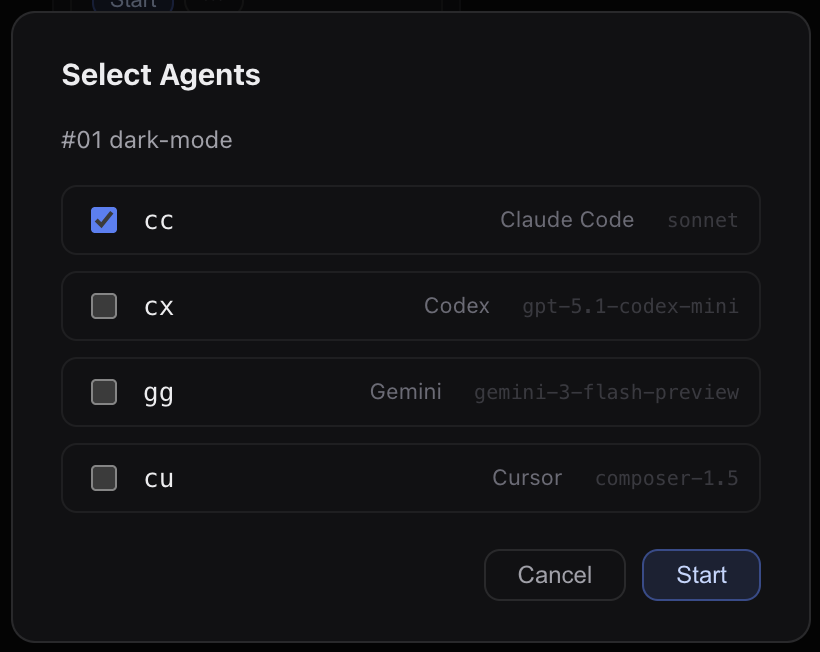
Click Start. Aigon creates a worktree, opens a tmux session, and begins implementation.
Watch the card update in real-time:
- Status moves from Starting → Working → Submitted
- The Sessions panel shows agent liveness with heartbeat updates every 30s
- Elapsed time and cost appear on the card as the session runs
Before closing, click the globe icon on the card to open a preview of that worktree’s dev server in your browser — eyeball the changes before committing to them. When you’re happy, click Accept & Close. Aigon merges the branch to main, moves the spec to Done, and cleans up the worktree.
Fleet mode
Fleet mode runs two agents on the same feature simultaneously. Find feature 03 — Rating System in the Backlog. Click Start and select two agents (e.g. Claude Code + Gemini CLI).
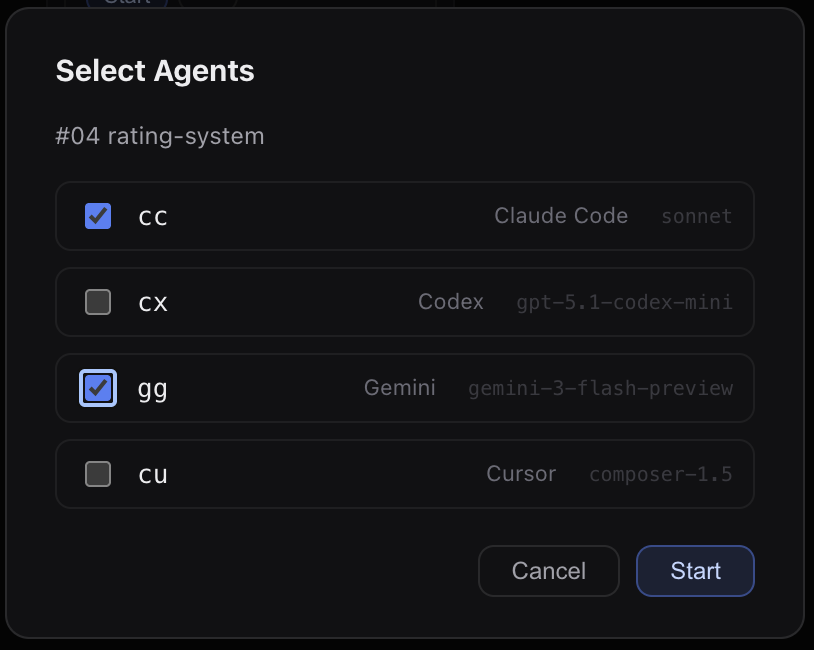
Two cards appear for the same feature — one per agent — both updating independently. When both show Submitted, click Evaluate to open a review session that compares both implementations and recommends a winner. Then click Accept & Close on your preferred card to merge it.
Autonomous mode
For a completely hands-off run, find feature 02 — Brewery Import, open its action menu, and click Start Autonomously.
A modal appears where you select an implementation agent, a reviewer, and when to stop. The default stop point is after close — the full lifecycle runs unattended.
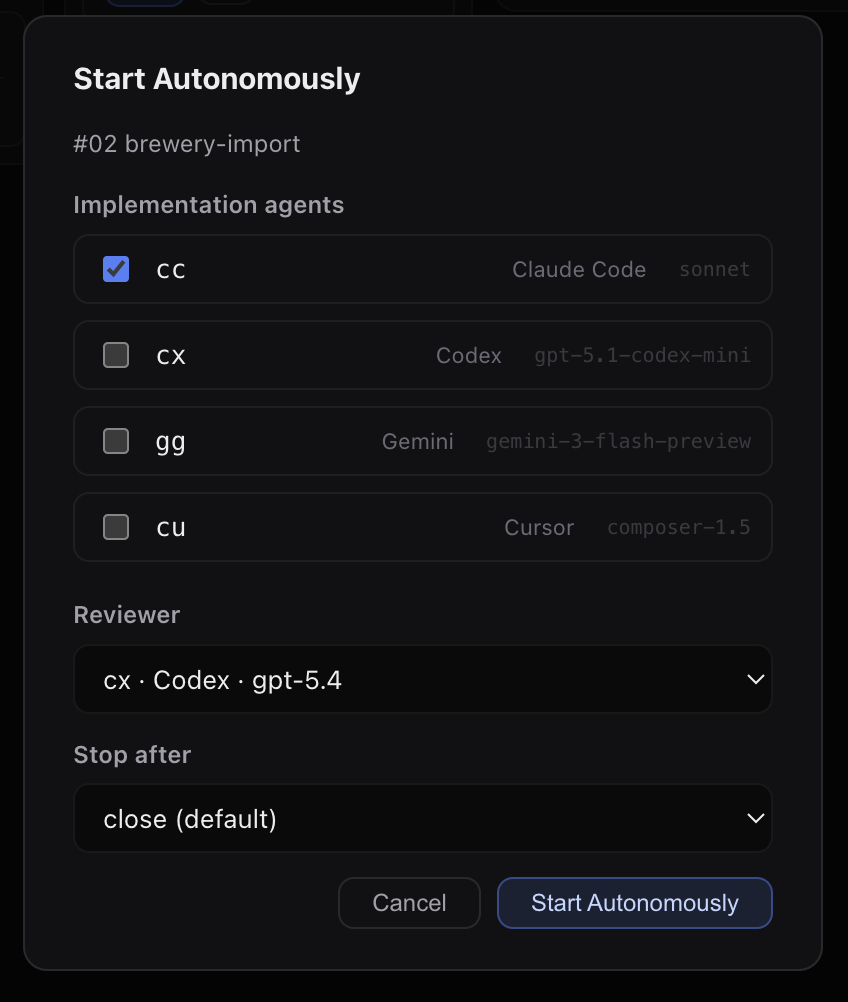
Click Start Autonomously. The AutoConductor spawns the implementation session, waits for it to finish, automatically runs a review, and calls feature-close — all without any further input from you.
Check the Reports tab after the session completes to see token usage and cost.
2. From slash commands in Claude
Open a Claude Code session in the Brewboard directory (or any worktree), and use /aigon: slash commands directly in the conversation.
Drive mode
/aigon:feature-start 01 ccClaude creates the worktree and begins implementing feature 01. You can watch it work, give feedback mid-implementation, or let it run to completion. When it signals done:
/aigon:feature-close 01Fleet mode
Start two agents on feature 04 from inside Claude:
/aigon:feature-start 04 cc ggBoth agents start in parallel. Once both signal submitted, run the evaluation:
/aigon:feature-eval 04The eval agent reads both diffs and writes a recommendation. Close with your chosen agent:
/aigon:feature-close 04 ccAutonomous mode
Hand the whole lifecycle over to the AutoConductor:
/aigon:feature-autonomous-start 02 --agent cc --review-agent ggThe conductor handles implementation → review → close automatically. You’ll see the feature move through the pipeline in the dashboard without any further commands.
3. From the CLI
All Aigon operations are available as CLI commands — useful for scripting, CI, or when you prefer the terminal.
Drive mode
aigon feature-start 01 ccThis creates an isolated worktree at ~/src/brewboard-worktrees/feature-01-cc-format-date/, launches Claude Code in a tmux session, and runs feature-do automatically inside it. Attach to watch:
tmux attach -t brewboard-f1-cc-format-dateWhen the agent signals submitted, close from the terminal:
aigon feature-close 01Fleet mode
aigon feature-start 04 cc gg # requires both Claude Code and Gemini CLITwo worktrees are created and both agents start implementing independently. When both are done, evaluate and close:
aigon feature-eval 04           # opens a review session comparing both diffs
aigon feature-close 04 cc       # merge cc's branch; or swap for gg
Autonomous mode
aigon feature-autonomous-start 02 --agent cc --review-agent ggWalk away — the AutoConductor handles implementation, review, and merge. Check aigon board when you’re back to see the result:
aigon boardReset and repeat
The seed repo is designed to be reset between runs:
aigon seed-reset ~/src/brewboardThis wipes all worktrees, branches, workflow state, and git history and re-clones from the seed — so you can try a different surface, mode, or agent from scratch.
Next steps
- Drive Mode — full lifecycle reference for single-agent work
- Fleet Mode — how parallel agents and evaluation work
- Autonomous Mode — hands-off loops with the AutoConductor
- Dashboard — what each panel shows and how to use it